
Showing posts with label Kids cards. Show all posts
Showing posts with label Kids cards. Show all posts
Monday, November 30, 2015
Tuesday, January 6, 2015

Saturday, March 30, 2013

Friday, March 29, 2013


Monday, September 17, 2012
Stampin Up Bird Punch - Daughters Birthday


Tuesday, August 21, 2012
Punch Art Giraffe Name Tag

The giraffe was made using the Stampin Up Owl Punch and the leaves came from the SU Bird Punch. I've made a few extras to make some cards with the spare giraffes.
Saturday, August 18, 2012
Baby Dragon Punch Art

I just sponged the background dots in coordinating inks to ensure the colours matched perfectly to the cardstock.

Background cardstock: Stampin Up Baja Breeze & Pretty in Pink
Patterned Card: SU Whisper White cardstock sponged with Baja Breeze or Pretty in Pink & Mellow Moss ink using daubers.
Baby Dragon: SU Wild Wasabi & Garden Green, Whisper White & Basic Black cardstock.
Punches: All punches used were Stampin Up - Boho Blossoms, Large Oval, Extra Large Oval, 1/2" Circle, 1 3/8" Circle (used to cut out mouth then sanded sharp corners to round off), Love heart from the Bird Punch.
Extras: Double-sided tape, SU Dimensionals (mounting block), daubers, multipurpose liquid glue, scissors, black pen, white gen pen.
Sunday, February 26, 2012


Saturday, August 27, 2011

Sunday, January 30, 2011
Iris Folding - Frog amongst the flowers
 If you look at past posts you will see I really love the technique 'Iris Folding'. From time to time I give it a break but when I do come back to it (and I always do) I remember why I enjoy it. You can make your main image as busy or simple as you like, and each one turns out so unique.
Below is a close up of the iris folding frog.
 Below is a small glance at the inside of the card to finish it off.
Tuesday, June 8, 2010
Punch art Tigerlily & Tiger

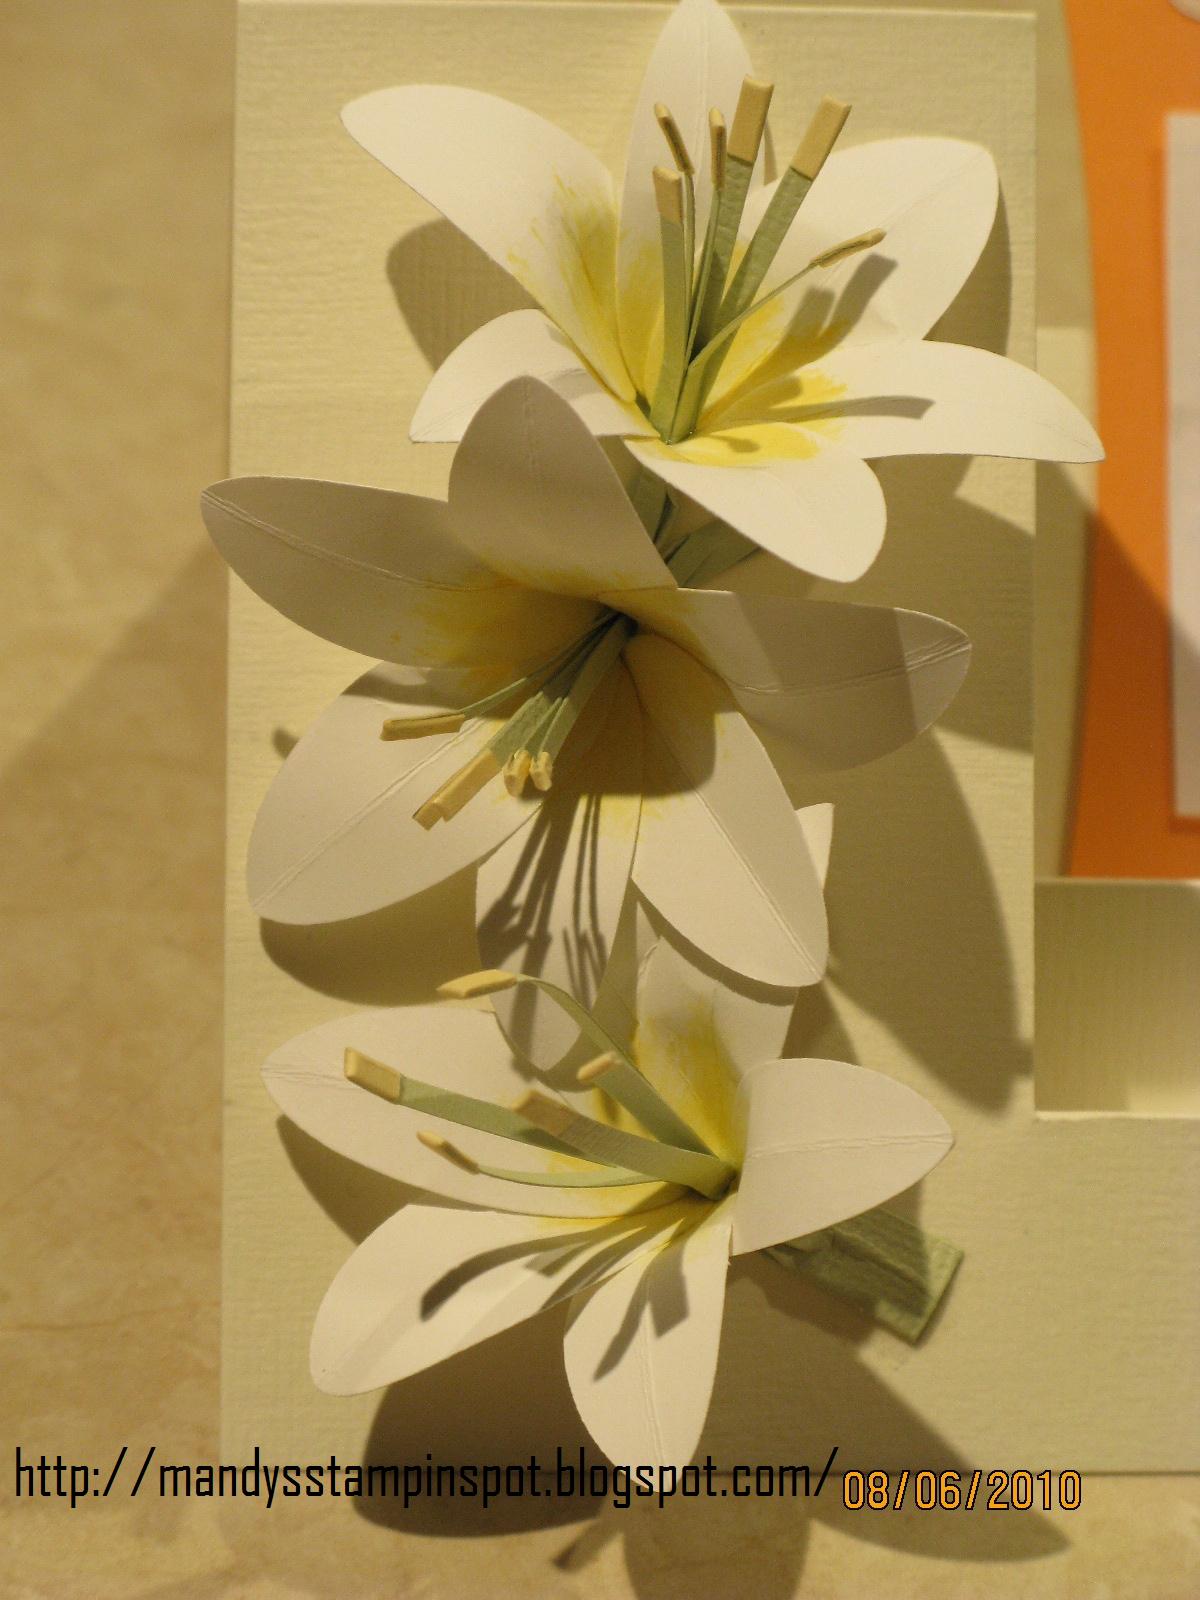
Okay, I definately bit off more than I could chew with this project. A good work friend asked me to design a baby card as her son and partner had a little girl last week. Bubby's name is 'Faith Tigerlilly' - Tiger because her son is crazy over tigers (the grrr type) and Lilly is a family name. Therefore I decided I would try to incorporate both themes ... there was my 1st mistake!
As time consuming as punch art is - I love it. It's cute and great for baby/kids cards however to make them reasonably quickly and easily - you need all the punches ... and there's mistake #2 - I don't have all the punches. So I adapted what I had and free drew shapes to create the tiger. Fiddly yet very cute I think. (The tiger design credit goes to Marie from Stamping Inspiration). Both websites credited in this post were random websites found doing a google search.
Speaking of which, after much searching for punch art lillies (and I'm talking hours), I found an online video tutorial (all credits go to Valita's Designs and Fresh Folds site). I won't explain how to make the lillies as the video is really good. After all this research, these tigerlillies are going to pop up on a few future cards! Anyway mistake #2 was repeated for the lillies as again I didn't have all the punches but made do with what I had.
Regardless of this, I'm really happy with it. Not a traditional baby card I know, but cute huh?
Saturday, May 8, 2010
Ladybug nappy cake


I made this nappy cake for my sister who has just had her 2nd daughter. At the time I made this we didn't know the sex of bubby, and as red is my favourite colour, this nappy cake was created. I used Stampin Ups large circle punch and a standard hole punch, glue and double sided tape. Very easy!
I also twisted some red wire and attached some of the ladybugs onto it to give a 'jiggly' effect.
Saturday, April 17, 2010
Punch art Sesame Street

This is one of my favourite cards which I made for my niece, (although it's also very appropriate as a boys card). She was able to name all the characters with no prompting so that was proof enough for me it was a close second to the original Sesame Street characters.
Although you can't see, Big Birds beak sticks out and a little red card, using the SU Oval (Small) punch, creates his tongue.
It was created entirely using punches, SU Scallop Circle, SU Circle (Large), standard hole punch for the black eyes, SU Circle (small) for the white eyes and Elmo's nose and SU Oval (small) punches, and I had a balloon punch which I used for Cookie mosters mouth. I used this instead of the SU circle punch as I wanted it a bit smaller to fit the cookie in. Very cool hey!?! I love it.
Subscribe to:
Posts (Atom)
